torsdag 31. oktober 2013

Happy Halloween - Billy puppet makeup (Saw)

I love this season and what is not to love. You have costumes and sfx makeup, you have gore and horror, and you get to eat a lot of candy. 

Today is also the one year aniversary for my facebook fan page.

Even though I am fully booked with finishing my Morrigan costume before the weekend, I just had to do something for this occation. 

This is a spur of the moment put together costume, so it is a little hastily executed.

I really liked the first saw movie, and ever since I saw a beauty makeup of the Billy puppet on pinterest I wanted to try it out. 

Me sitting in a playground in the middle of the night


My initial inspiration
Billy puppet, photo: danielfelushia.wordpress.com

I do not take credit for the idea, but I can show you how I did it. 

I started with a plain white cream facepaint. This is difficult to get even. I went with the method of "dabbing" it on with a sponge rather than smearing. First a layer of white, then a layer of powder, then another layer of white.

Black eye shadow was added around the eyes. 

Then more brown eyeshadow around the eyes, along the nose and in circles on the cheeks. As a stencil for the circles I used the cap of my hair spray and a small makeup brush to outline it with brown eye shadow. 

Define the eyebrows and add more black around the eyes. 

Now the swirlies in the cheeks. I used red acryllic paint mixed with a bit of water and a fine brush to paint it inside the circles on my cheeks. 


What is looks like so far.

And red lipstick outlined with brown eyeliner.

Almost there, doll lashes have been added and the black stripes have been painted on using eyeliner. 


At last I found a (horrible) black wig, borrowed my boyfriends white shirt and used a hair bow at the collar. 


Now let's find a playground or a park!


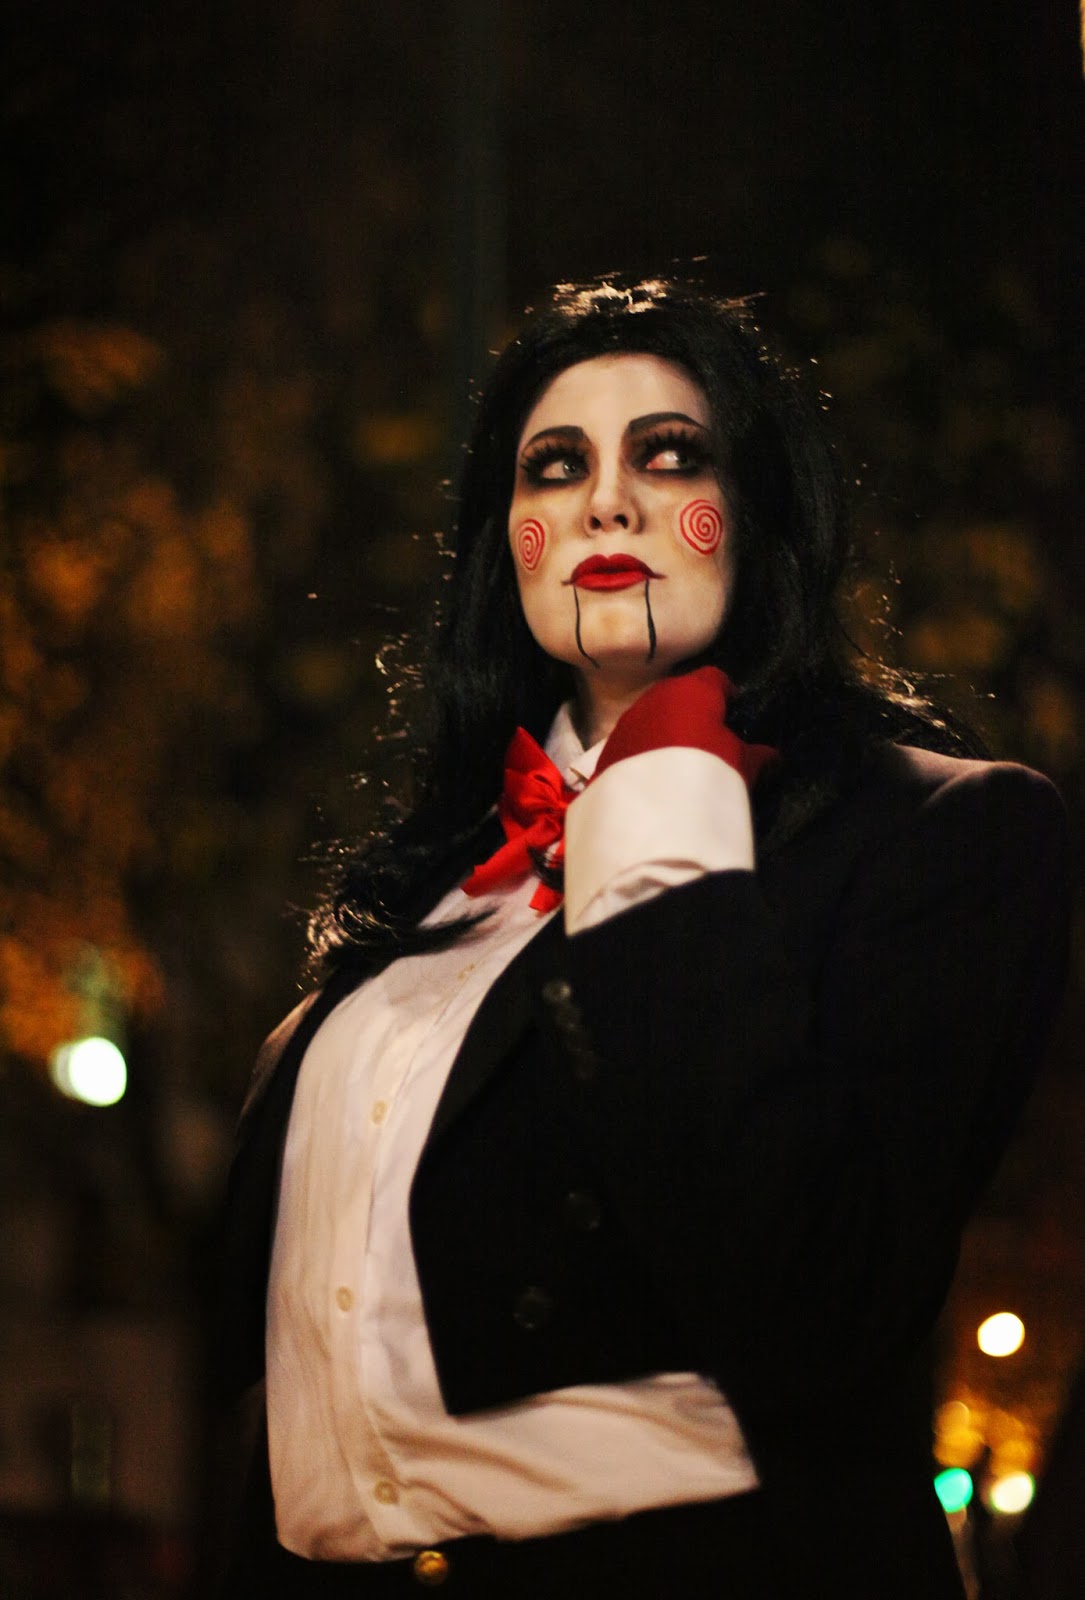
There you have it, this years Halloween makeup. Good thing I have a lot of stuff laying around the house. The tailcoat was actually hand tailored and given to me by my mother who found it at a flea market. 

Happy Halloween.  

tirsdag 29. oktober 2013

Gamex and Bioware

Bioware is coming to gamex this year too, and Karin Olava and I will be showing off our Dragon Age Inquisition cosplays as their guests. This is so unbelievingly cool. 


I will be bringing my Morrigan Orlais Ball gown as shown in the trailer and Karin will be an Inquisitor matched to my dress. 

I will write a walkthrough on how I made this costume, but as it is not finished yet, it has to wait a bit. 

But what is even better is that I am a part of the program, I will take part in the Cosplay autograph session dressed as Morrigan. 


Instead, enjoy the trailer one more time.

Morrigan Dragon Age Inquisition - Necklace and bracelet

Some of you might have noticed that I like Bioware (cause they're awesome) and as a co-op project with Karin Olava I made Morrigan Orlais Ball Gown from Dragon Age Inquisition to go with her Inquisitior. 
Tutorials for:


Since the game is not out yet there's a limited number of reference photos, so I have actually no idea on what the dress looks like from behind. 

As I am not the best seamstress I started with the necklace ;) 
(gimme that worbla)

Here is a rough sketch of the patterns for the worbla (sorry, I have a tendency to scrap the real patterns when I'm done)
1. is the larger base of the necklace and 2. is the ornaments on top of that. 3. is the collar going up to the neck and 4. is just a strip of worbla used to hide the seam between the lower and upper part of the necklace. 5. is the ornament hanging, here I first made a template in vardbord, build it up a bit with paper clay and then covered it in worbla.  

I used my tailor bust as a model, covered in tin foil so the layers of worbla would not get stuck. Here I am adding the upper collar (part 3.)

I have only used one layer of worbla here, but I would recommend a double layer as that won't get so "wobbly". 


A lot of adjusting to get the shape right with several test fits on my own neck.


Primed with Gesso

More layers of Gesso

Then spray paint gold

And detailed using dark brown acryllic paint, first a weathering coat and then hand painted details. 

Some more detailing

Finish off a clear coat. 


Here I have trimmed the edges, you should do this before you paint (but I forgot).

(It is hard to smile AND take a "selfie" apparently)  

This is the result, I might add more details laterbecause I am not pleased with the colored stone, but now I have to finish the corset. 

But she also have a bracelet

So with my worbla leftovers I shaped the bracelet around a soda can.

Primed with glue and painted gold. 

søndag 13. oktober 2013

Lady Smith Splicer cosplay

A few days before Metrocon I suddenly decided that I wanted to enter the costume competition because I find that conventions are much more fun when you are a part of all that’s going on. And it is fun to be on stage. 


Photo: bioshock.wiki.com

So with a little over two days I needed to make a new costume. Since I already had made the Splicer Bunny Mask earlier and I was going to hold a panel about Zombie sfx makeup, the Splicer became the natural choice.


My finished costume
Photo by: Tom Vidar Johannessen

The process - or what I managed to document this time
Sorry for the lack of photos this time, everything went really fast.
I needed the suit, and made a pattern tracing an existing blazer jacket.

My pattern


MØNSTER


The Spine
I am especially satisfied with my spine, which is made out of a piece of cardboard with left over foam pieces and with a nylon pantyhose glued to it. And as always, highlight and shade your details, here I have only used watered out acrylic paint.

Photo by: Tom Vidar Johannessen

Splice up
But a real splicer is disfigured, how to make the boils and growths.

I took different sized bowls and slushed latex in them. That it really. Reinforce it with tissue paper and color it with foundation first, and stipple red paint to add effect. Draw on some veins if you like. If you spray it with fixing spray it also gets nasty shiny.


They are attached using latex and issue. I was counting on the pantyhose covering my bad edges this time, but apparently not. Next time, darker stockings. 

The face
For the face I only used a piece of latex folded and put it over my nose. The edges are horrible, but it did the trick for a fast cosplay. And smudge out that deep red lip stick and draw on some huge eye brows and you are nearly there.


But in the end I liked the gruesome effect of this cosplay hasty, I even won the Horror category.
Photo by: Tom Vidar Johannessen


And since I came to the finals in the cosplay comepetition I had to make a small stage performance. So here it is, after 20 minutes of panic planning.